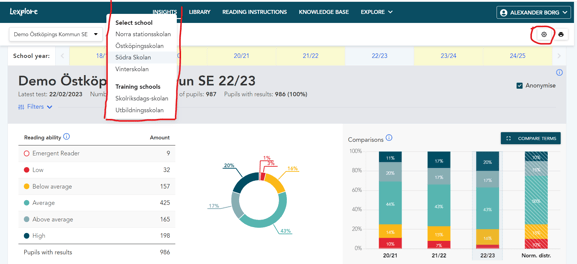
You can rename a class directly in the Lexplore Portal on the settings page for each specific class. When you have filtered down to a class, a cog for settings appears in the upper right corner.
In order to rename a class manually in Lexplore you need the role of 'Organisation Administrator', 'Examiner', 'Project Leader', or 'Ambassador'.
If your organisation has an SIS integration with Lexplore, classes will be created automatically from the integration between the SIS and Lexplore. Therefore, the manual function of renaming a class is blocked while the integration is active.
How to rename a class manually in Lexplore
- Log into Lexplore Portal; portal.lexplore.com
- Make sure you have filtered down to a specific school on the left-hand side in Insights (Only necessary if you are a member of many schools within one municipality or Academy Trust).

- Click on the cog that will appear in the upper right corner once filtered down to the school level.
- Click on classes, and then click on the class you wish to rename from the list shown.

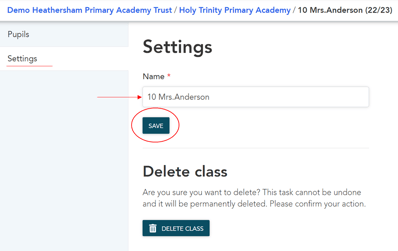
- Go to 'Settings' for that class and write the new name in the field for 'Name'.

- Click "SAVE" and the new name will be saved. By going back to the list of classes, you can see that class has been renamed.
Each class name needs to be unique for the school. If you need to change names between two classes, you first need to add a temporary name for one of the classes. There can not be duplicates.
🛎️Here at Lexplore, we love to help our users with their questions and provide self-help guides for a quicker service. Please respond below in the Questions whether or not this article was helpful. 😊
