Note: This permanent anonymisation of students personal identifiable information should not be confused with the function in Lexplore's Portal for temporary anonymising / hiding students' names. Read more about that function here: Hide students' names in Lexplore
Set number of days until anonymisation in your organisation
Note: To do this you must have the role Project Manager or Organisation Administrator.
- Log in to the Lexplore Portal at www.portal.lexplore.com
- Press the cog wheel in the top right corner of the portal

- Go to the settings tab and find the setting "Days until leavers are anonymised"
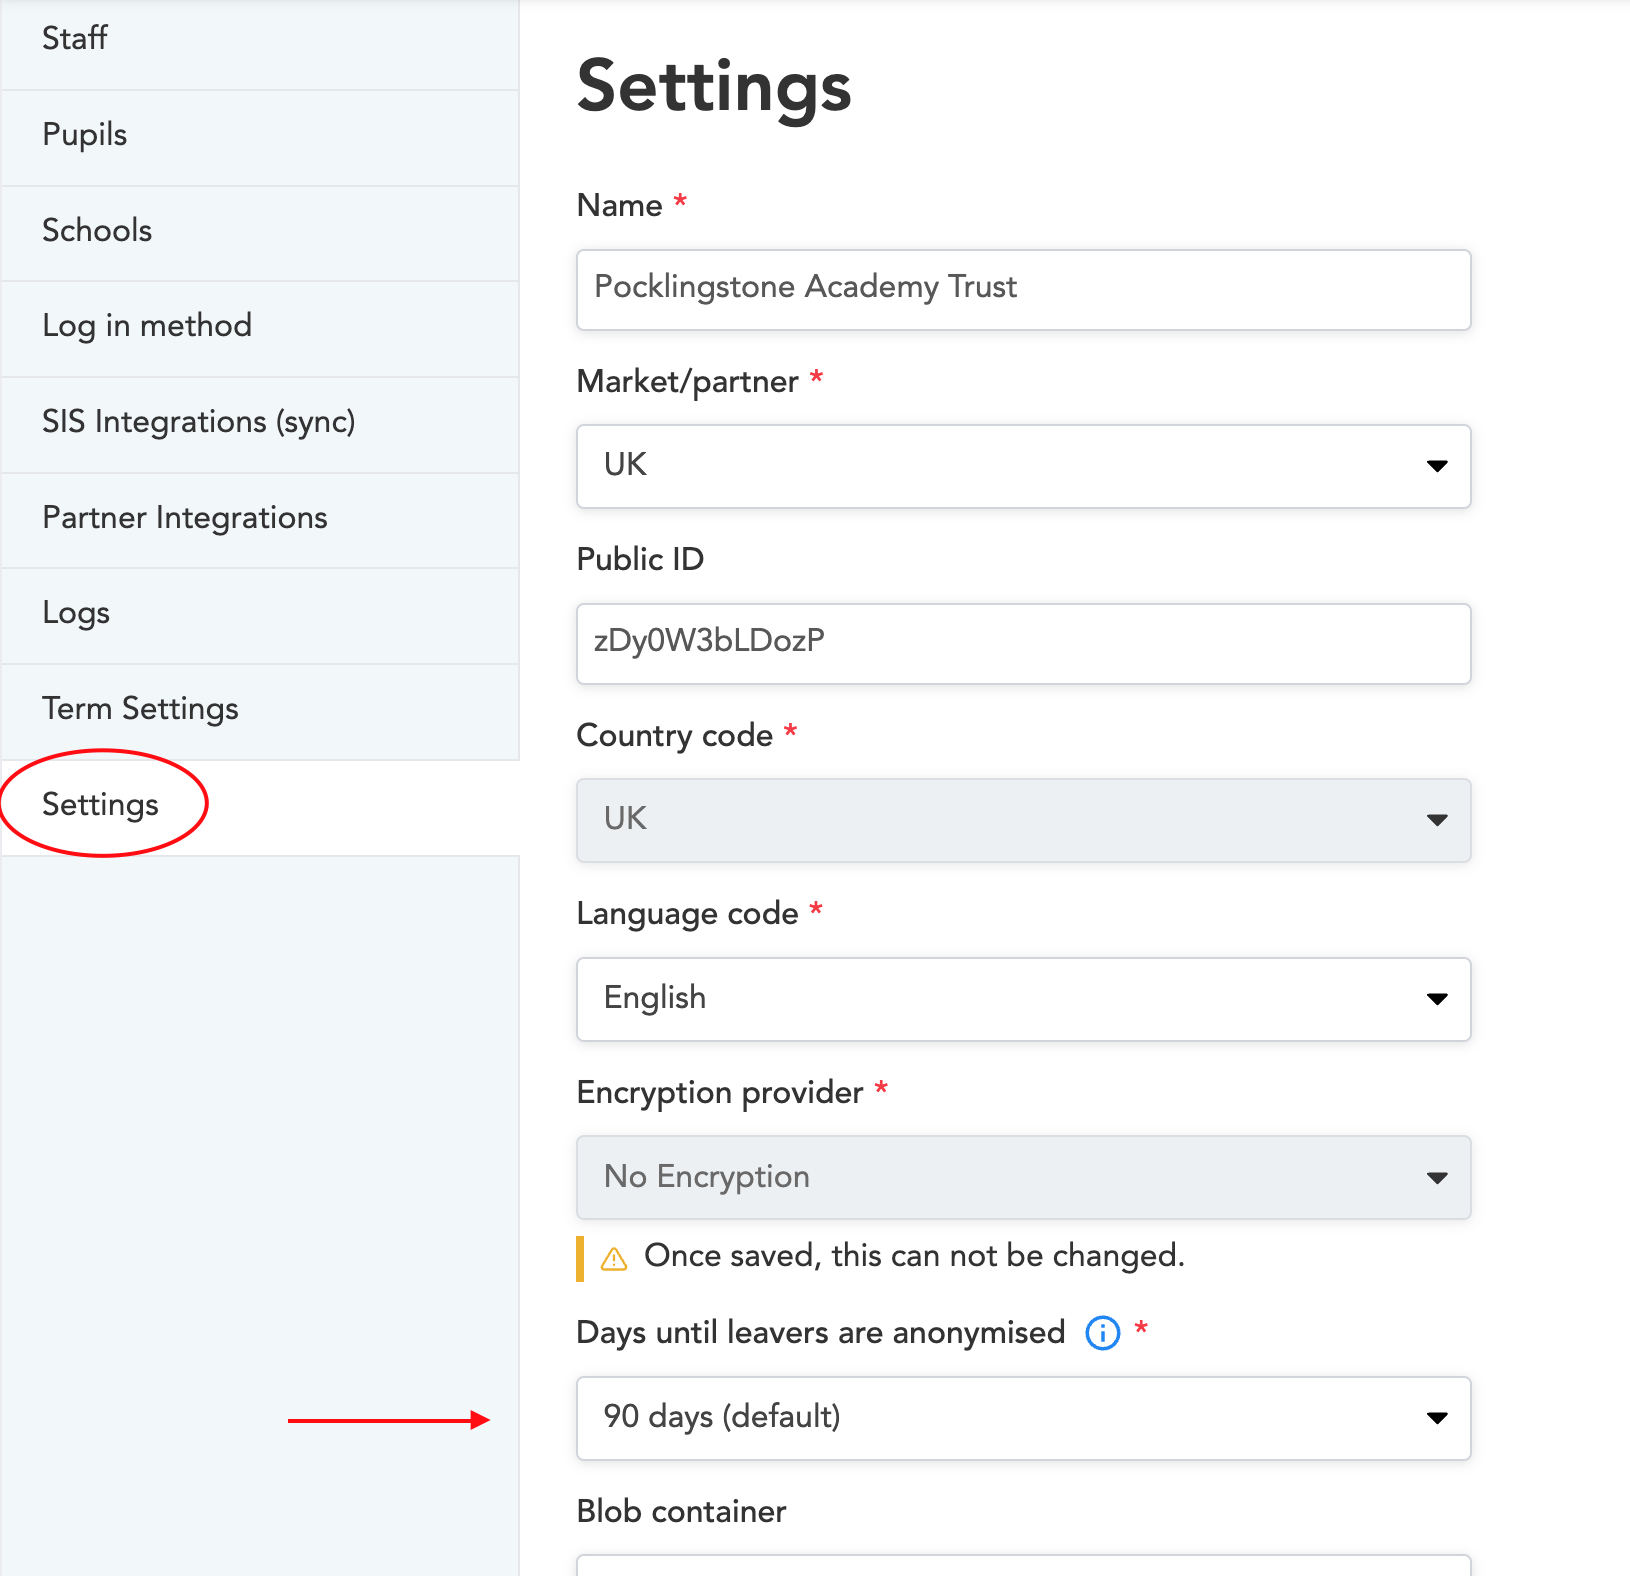
- Here you can choose the number of days you would like to set for your organisation. You can also choose "never" if you don't want your leavers to become anonymised.
- Press save.
Now you have successfully updated the number of days until students that have left are anonymised.
General info about anonymisation
- When a student is marked as a leaver, the countdown to anonymisation starts. Then, after as many days as you organisation has set, all the students personal identifiable information will be anonymised.
- The student anonymisation is done each night.
- When the settings are changed to a lower number of days than before, that will take effect the following night, anonymising all students that were marked as leavers before the new number of days ago.
How to bring back and deanonymise an anonymised pupil
Since the student is anonymised, Lexplore doesn't have any of their personal identifiable information. Therefore it might seem impossible to bring this student back. However, if you know which student it is and have access to the student's information you can bring it back in the following way:
- Log in to the Lexplore Portal at www.portal.lexplore.com
- Navigate to the latest class the student was part of before it was marked as a leaver.
- Press the cog wheel in the top right corner of the portal
- Go to the bottom of the page and expand the list of leavers.

- Find the student that you wish to bring back in the list of leavers . Please make sure that you are 100% sure of which student to deanonymise. This might be hard since the student's information is missing, but if you know the class well you can try to figure out who is who by looking at the pupil's assessment results and reading.
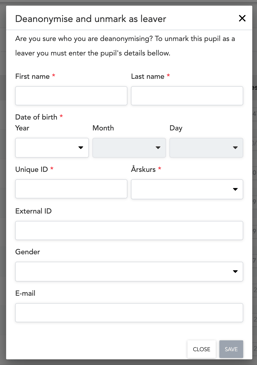
- Press the + on the student you wish to bring back.

- If the student is anonymised you will be asked to fill in the students details in order to bring it back. If it isn't anonymised you will not need to do this step. Fill in the student's details and press save.
Now the student is unmarked as a leaver and brought back with the information that you just filled in.
🛎️Here at Lexplore, we love to help our users with their questions and provide self-help guides for quicker service. Please vote below in the Question whether or not this article was helpful. 😊